
In This Article
There’s a particular kind of British optimism that kicks in around October, when the nights draw in and someone in your household says “we should just build one.” A sauna, that is. And if you’ve gone down the rabbit hole of research since, you’ll already know the fork in the road: buy a boxed-up cabin for thousands of pounds, or take the DIY route and fit infrared panels for DIY sauna conversion into a space you already own — a garden shed, a boxroom, an under-stairs cupboard nobody’s used since 2019. Infrared panels for DIY sauna projects are simply radiant heating elements — usually carbon fibre, ceramic, or a hybrid of the two — that warm your body directly rather than heating the air around you, which is what makes them so well suited to a bit of home carpentry.
This guide pulls together seven real, currently available panels and kits, weighs their specs against what they actually feel like to live with, and walks through the unglamorous but essential bits — insulation, spacing, wiring — that decide whether your finished sauna is a triumph or a fire risk. As Wikipedia’s overview of infrared sauna technology explains, the core distinction from a traditional Finnish sauna is that the body is heated directly rather than the surrounding air, which is precisely why a lower-power DIY conversion is even feasible in the first place. Nothing here is going to read like a spec sheet with a British accent bolted on; every product comes with an honest opinion attached, and every opinion is grounded in the numbers, not vibes.
Quick Comparison Table
| Panel/Kit | Wattage | Voltage | Best For |
|---|---|---|---|
| Harvia Basic Infrared Sauna Panel 400W | 400W | 230V | Budget-conscious first-timers |
| Sentiotec Heat Wave Infrared Heating Plate | 100–510W | 230V | Flexible, modular installs |
| Tylöhelo Infrared Element Panel | 350–600W | 230V | Scandinavian-spec purists |
| byecold Infrared Panel Heater | 700–1200W | 230V | Repurposed budget heat |
| KLARSTEIN Infrared Panel Heater | 300–800W | 230V | Smart-home integrators |
| UK Saunas Two-Person Infrared Kit | ~1400W total | 230V | Complete beginners |
| Generic Carbon Fibre DIY Panel Kit | 250–300W | 220–240V | Trial-and-error tinkerers |
Reading across this table, the wattage spread tells its own story: nothing here needs anywhere near the current a traditional stove-style heater demands, which is exactly why infrared panels for DIY sauna builds have become the go-to for anyone without access to a three-phase supply. The UK Saunas Two-Person Infrared Kit sits at the top of the table for a reason — it’s the only genuinely plug-and-play option — while the standalone panels from Harvia, Sentiotec, and Tylöhelo reward people who actually want to design their own cabin from scratch. Budget shoppers eyeing the Generic Carbon Fibre DIY Panel Kit should note its lower wattage means you’ll need more units to hit adequate coverage, which we unpack properly in the spacing section below.
💬 Just one click — help others make better buying decisions too!😊
Top 7 Infrared Panels for DIY Sauna: Expert Analysis
Choosing between an infrared sauna panel kit review’s worth of options usually comes down to three questions: how much wall space you’ve got, how much wiring you’re willing to attempt yourself, and how much you want to spend before you’ve even bought wood. The seven below cover budget, mid-range, and premium territory, plus a couple of left-field picks worth knowing about.
1. Harvia Basic Infrared Sauna Panel 400W — low-EMF budget entry point
The Harvia Basic Infrared Sauna Panel 400W is the standalone panel most UK DIY builders land on first, largely because Harvia’s parent brand carries serious weight in the European sauna trade. Its 400W output, glass-ceramic front cover, and built-in reflector are designed to spread heat evenly across a small-to-medium cabin without hotspots — the reflector matters more than it sounds, because a panel without one can leave one corner of your sauna noticeably cooler than the rest.
Based on the spec comparison with rival panels in this bracket, the standout feature is its low-EMF rating, meaning the electromagnetic field it emits sits well below the levels flagged as a concern by wellness-focused buyers, without Harvia inflating the price to “premium wellness” territory. This is a panel for someone converting a modest cupboard or single-occupant booth rather than a family-sized cabin, and it suits buyers who’d rather pay a bit more upfront for a brand with a genuine sauna heritage than gamble on an unknown import.
Reviewers of Harvia’s infrared range consistently note straightforward installation and a comfortable, non-scorching heat, though verified customer-review volume specifically for this panel size is thinner than for Harvia’s full sauna cabins, so treat that sentiment as indicative rather than exhaustive.
Pros:
- ✅ Low-EMF rating suits health-conscious buyers
- ✅ Even heat distribution via built-in reflector
- ✅ Backed by an established European sauna brand
Cons:
- ❌ 400W means you’ll need several for a larger cabin
- ❌ Premium branding pushes it above generic alternatives
Expect to pay in the low-to-mid £100s per panel, in the £100–£200 range depending on retailer — solid value once you factor in the brand backing, though check current price before committing to a multi-panel order.

2. Sentiotec Heat Wave Infrared Heating Plate — modular wattage for tight spaces
Sentiotec, now folded into the Harvia group but still trading under its own name, makes one of the more flexible options on this list: the Sentiotec Heat Wave Infrared Heating Plate is available across a wattage range from around 100W right up to 510W, sold as individual plates you mix and match to your room’s dimensions. That range matters practically — a small conversion like a boxroom might only need one or two of the lower-wattage plates, while a bigger family cabin can be built up from several of the higher-output versions without switching brands or control systems.
What most buyers overlook about modular panel systems like this is the compatibility angle: because every plate in the Sentiotec range works with the same control units, you can start small and add capacity later, which is a genuinely useful hedge against underestimating your own build. The insulated rear side is worth flagging too — it pushes heat forward into the room rather than wasting it through the wall cavity, an efficiency detail that cheaper unbranded panels frequently skip.
Aggregated feedback from UK sauna suppliers stocking the Sentiotec range points to reliable long-term performance, though as with most specialist infrared plates, publicly verifiable review counts on general marketplaces remain limited.
Pros:
- ✅ Wattage range covers small rooms to large cabins
- ✅ Insulated rear panel reduces wasted heat
- ✅ Modular system allows staged expansion
Cons:
- ❌ Requires a compatible Sentiotec control unit
- ❌ Higher-wattage plates sit in the premium price bracket
Pricing spans a wide £100–£300 range depending on wattage chosen, so decide your room size before you order to avoid paying for capacity you don’t need.
3. Tylöhelo Infrared Element Panel — Scandinavian build quality
Tylöhelo (commonly shortened to Tylö) is one of the longest-standing Scandinavian sauna manufacturers, and the Tylöhelo Infrared Element Panel carries that heritage into the infrared space with a 350–600W range aimed at mid-sized DIY cabins. On paper this means slightly more headroom than the Harvia Basic, without tipping into the higher running costs of the largest panels on this list.
What sets it apart in a spec comparison is build tolerance — Tylö panels are manufactured to the same quality standards as the brand’s full electric sauna heaters, which is reassuring if you’re the type of builder who worries about a panel warping or cracking after a few dozen heat cycles. The trade-off is availability: Tylöhelo infrared elements are more commonly sourced through specialist UK sauna suppliers than general marketplaces, so factor slightly longer lead times into your build schedule.
For buyers who’ve already committed to a Scandinavian-style cabin aesthetic — pale wood, minimal hardware — matching the heater brand to that design language has a certain coherence that’s hard to quantify but easy to notice once it’s missing. Reviewers who’ve fitted Tylö infrared elements into custom builds tend to highlight consistent heat output over multiple seasons, a genuinely useful signal for anyone worried about long-term reliability.
Pros:
- ✅ Manufacturing quality matches Tylö’s full heater range
- ✅ Wattage suits mid-sized cabin conversions
- ✅ Strong reputation for multi-season reliability
Cons:
- ❌ Longer lead times through specialist suppliers
- ❌ Limited availability on general marketplaces
Budget around the £150–£350 range per panel depending on wattage — check current price with a specialist supplier, as availability shifts more than with mass-market brands.
4. byecold Infrared Panel Heater — smart thermostat control on a budget
Here’s where things get honest: the byecold Infrared Panel Heater isn’t marketed as a sauna component at all — it’s sold as a general-purpose room heating panel, typically rated between 700W and 1200W with a built-in thermostat. DIY builders have adopted it anyway, because the price-to-wattage ratio is hard to beat and the thermostat control removes the need to buy a separate sauna controller for smaller builds.
Here’s what to weigh before you go this route: a panel designed for a living room hasn’t been engineered for the humidity and repeated heat cycling a sauna interior produces, so you’re taking on a bit of extra risk around long-term durability that a purpose-built sauna panel wouldn’t carry. That said, for a first attempt at a compact single-person booth where budget is the deciding factor, the byecold panel’s high wattage-per-pound makes it tempting, and its slim profile mounts easily to a timber-framed wall.
Amazon reviews for byecold’s panel heater range frequently praise quick heat-up times and simple wall-mounting, though those reviews are overwhelmingly written by buyers using the product as intended — as a room heater — rather than inside a sauna cabin, so treat sauna-specific durability claims with appropriate caution.
Pros:
- ✅ Excellent wattage-per-pound for the budget
- ✅ Built-in thermostat cuts controller costs
- ✅ Slim profile suits tight cabin walls
Cons:
- ❌ Not engineered for sauna humidity or heat cycling
- ❌ No sauna-specific warranty coverage
Prices generally fall in the £60–£120 range, making it one of the cheapest routes into infrared panels for DIY sauna conversion — just budget for the possibility of earlier replacement.
5. KLARSTEIN Infrared Panel Heater — Alexa-compatible smart panel
Much like the byecold option above, the KLARSTEIN Infrared Panel Heater is a crossover pick: KLARSTEIN built its name on smart-home lifestyle appliances, and this panel — rated in the 300–800W range depending on model — happens to work well when repurposed for a small sauna conversion. The standout feature here is genuinely useful rather than gimmicky: Alexa voice compatibility lets you fire up the panel before you’ve even walked into the room, which sounds like a novelty until you’re stood in a cold garden in January wishing the sauna had already started warming.
Based on the spec comparison with the byecold unit, KLARSTEIN’s panel tends to run slightly quieter and includes more granular temperature stepping, which matters if you’re sharing wall space with a bedroom and don’t want an audible click every few minutes. What most buyers overlook is that smart-home integration also means remote monitoring — useful for checking your sauna’s actually heating up before you head out to it, rather than a nice-to-have you’ll never touch.
Customer reviews for KLARSTEIN’s infrared panel range consistently mention the app’s reliability as a strong point, alongside occasional mentions that the higher-wattage variants run warm to the touch on the housing itself, a detail worth noting for cabin spacing.
Pros:
- ✅ Alexa and app control for remote pre-heating
- ✅ Quieter operation than comparable budget panels
- ✅ Granular temperature stepping for shared-wall setups
Cons:
- ❌ Housing runs warm on higher-wattage models
- ❌ Smart features add cost over a basic panel
Expect a price in the £80–£160 range depending on wattage — solid value if the smart features genuinely fit how you’ll use the space.
6. UK Saunas Two-Person Infrared Sauna Kit with Carbon Heaters — complete flat-pack conversion
If the idea of sourcing individual panels, a controller, and matching wiring separately sounds like more admin than you signed up for, the UK Saunas Two-Person Infrared Sauna Kit with Carbon Heaters solves that by bundling everything into one flat-pack delivery. Built from Canadian hemlock and sold with carbon heaters already integrated into the panel walls, it’s designed for genuine DIY assembly by two people using the supplied instructions, rather than requiring an electrician to design the layout from scratch.
Here’s what the spec sheet won’t tell you, but the format implies: because the panels are pre-fitted into the wall sections at the factory, you lose some of the customisation that standalone panels like the Harvia or Sentiotec allow, but you gain a huge amount of certainty that the spacing and wattage have already been calculated correctly for the cabin size. That’s a meaningful trade for anyone nervous about getting panel placement wrong on a first attempt.
The kit comes with a five-year parts guarantee direct from the seller’s UK warehouse, a detail that matters more than it might seem, since sourcing replacement carbon heater elements for an unbranded panel years down the line can be a genuine headache. It’s listed as a small business product on Amazon, and aggregated buyer feedback for the range points to straightforward flat-pack assembly as the most repeated positive, with occasional comments about panel-to-panel fit requiring patience on the first build.
Pros:
- ✅ Panels pre-fitted, removing spacing guesswork
- ✅ Five-year parts guarantee from a UK warehouse
- ✅ Genuine two-person DIY assembly, no electrician needed for the wood build
Cons:
- ❌ Less customisable than standalone panel systems
- ❌ Higher upfront cost than buying panels separately
This is a premium pick, typically in the £1,500–£2,500 range for the full two-person cabin kit — expensive relative to standalone panels, but you’re buying a finished design, not just heating elements.
7. Generic Carbon Fibre DIY Sauna Panel Kit — cheapest way to test the waters
Every category has an entry point for people who aren’t yet sure they’ll finish the project, and for infrared panels for DIY sauna conversion, that’s the Generic Carbon Fibre DIY Sauna Panel Kit — the kind of unbranded, marketplace-sourced panel typically rated around 250–300W, framed in Canadian hemlock, and sold without a plug or controller attached. The lack of a plug isn’t an oversight; it’s standard for this category, since these panels are meant to be wired into an existing or purpose-built sauna control system by whoever’s doing your electrical work.
What the spec sheet won’t tell you is how much this category varies seller to seller — carbon crystal quality, frame finish, and wiring gauge differ noticeably between otherwise similarly priced listings, so reading individual seller feedback matters more here than with a branded panel. The honest analytical take: this is the right choice for a first small-scale test build, a single-person booth, or someone supplementing an existing partial installation, but it’s the wrong choice if you want a five-year guarantee or guaranteed parts availability down the line.
Review sentiment across generic carbon fibre panel listings tends to split cleanly — buyers who understood they were getting a bare heating element are largely satisfied, while a smaller group expected a plug-and-play product and were caught out by the missing controller and cabling, which is worth knowing before you click buy.
Pros:
- ✅ Lowest entry price of any option on this list
- ✅ Genuine carbon fibre element, not a cheaper ceramic substitute
- ✅ Compact enough for single-person booth conversions
Cons:
- ❌ No plug, controller, or wiring included
- ❌ Quality and support vary significantly by seller
Prices typically sit in the £30–£70 range per panel — check current price and read seller-specific feedback carefully, since this category has the widest quality spread of anything on this list.
Top 7 Panels Compared: Specs, Price Range & Best For
| Panel/Kit | Wattage | Frame Material | Price Range | Best For |
|---|---|---|---|---|
| Harvia Basic Infrared Sauna Panel 400W | 400W | Wood-framed, glass-ceramic front | £100–£200 | Single-booth budget builds |
| Sentiotec Heat Wave Infrared Heating Plate | 100–510W | Insulated-back plate | £100–£300 | Staged, modular installs |
| Tylöhelo Infrared Element Panel | 350–600W | Scandinavian-spec frame | £150–£350 | Multi-season reliability |
| byecold Infrared Panel Heater | 700–1200W | Slim metal housing | £60–£120 | Compact budget booths |
| KLARSTEIN Infrared Panel Heater | 300–800W | Slim smart-panel housing | £80–£160 | Smart-home integration |
| UK Saunas Two-Person Infrared Kit | ~1400W total | Canadian hemlock cabin | £1,500–£2,500 | Beginners wanting a finished kit |
| Generic Carbon Fibre DIY Panel Kit | 250–300W | Canadian hemlock frame | £30–£70 | First test builds |
The clearest pattern in this table is that price scales far more with completeness than with raw wattage — the UK Saunas Two-Person Infrared Kit costs roughly ten times more than a standalone panel not because its heating elements are ten times more powerful, but because you’re buying a finished cabin, controller, and warranty in one purchase. If your priority is minimising spend while you learn, the Generic Carbon Fibre DIY Sauna Panel Kit and byecold Infrared Panel Heater both sit comfortably under £120, though neither comes with the safety net a branded panel or complete kit provides.
Infrared Panels for DIY Sauna: New Build vs Retrofit
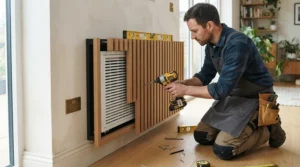
There’s a meaningful difference between fitting infrared panels for DIY sauna conversion into an existing wooden structure — a shed, a garden room, an old changing cubicle — and building a cabin from scratch specifically to house them, and it changes almost every decision that follows. Retrofitting means working around whatever insulation, wiring, and ventilation your existing structure already has, which can save serious money but forces compromises on panel placement you wouldn’t accept in a purpose-built cabin. A new build, by contrast, lets you plan wall cavities, cable routes, and panel spacing before a single board goes up, which is why kits like the UK Saunas Two-Person Infrared Sauna Kit are engineered as complete systems rather than retrofit components. That distinction matters because retrofitting an under-insulated shed is far more forgiving with infrared panels than it would be with a traditional stove-style heater — you’re not fighting to hold ambient air temperature across an entire room, just delivering enough panel wattage per body. That said, retrofits still need enough insulation to stop heat escaping through the structure entirely, which the next section covers properly.
Setting Up Your Infrared Panel Conversion: A Step-by-Step Walkthrough
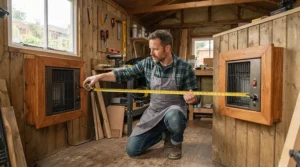
Getting from a stack of panels to a working sauna follows a predictable order, and skipping steps is where most first-time builds go wrong. Start by confirming your wall cavity depth can accommodate the panel thickness plus any required air gap behind it — most standalone panels need at least a small clearance to prevent heat building up against combustible framing. Next, plan your cable routes before insulating, because retrofitting cabling through finished insulation is a genuinely miserable afternoon nobody enjoys. Mount panels at the heights and spacing recommended for your chosen wattage (covered properly below), then fit your control unit somewhere accessible from both inside and outside the cabin if your budget allows a dual-panel setup. Once wired — ideally by a qualified electrician, which we’ll come back to — run a test heat cycle with the door open before your first full session, checking for any unusual smells, uneven heating, or panels that feel disproportionately hot to the touch. Common first-30-days mistakes include over-tightening panel mounting screws (which can crack ceramic-fronted panels), forgetting to seal cable entry points against moisture, and underestimating how much longer a larger cabin takes to reach a comfortable temperature compared with the compact booths most manufacturer demo videos show.
✨ Don’t Miss These Exclusive Deals!
🔍 Take your infrared panels for DIY sauna project to the next level with these carefully selected products. Click on any highlighted item to check current pricing and availability. These panels will help you build a genuinely relaxing home retreat your whole household will enjoy!
Real-World Conversions: Three UK Self-Builders and Their Panel Setups
If you’re a flat-dweller with a boxroom and a single-person budget, a setup built around the Generic Carbon Fibre DIY Sauna Panel Kit or one Harvia Basic Infrared Sauna Panel 400W makes the most sense — low total wattage keeps you within a standard domestic circuit, and the compact footprint suits a converted cupboard rather than a dedicated room. If you’re a family with a garden shed and weekend DIY time to spare, the UK Saunas Two-Person Infrared Sauna Kit removes most of the guesswork, letting two people assemble a finished cabin over a weekend without calculating panel spacing from scratch. And if you’re the sort of person who enjoys tinkering and already has some electrical confidence, a modular build using two or three Sentiotec Heat Wave Infrared Heating Plates lets you start small in a single-person booth and expand the same system into a larger cabin later, without replacing your control unit. Each of these profiles trades cost, convenience, and customisation differently — there’s no universally “best” answer, only the one that matches how much time, money, and DIY patience you’re actually bringing to the project.
Panel Spacing Guidelines: Solving the Most Common Wattage Mistakes
The single most common mistake in infrared panel conversions isn’t a wiring error — it’s getting spacing and wattage-per-cubic-foot wrong, and it shows up as either an uncomfortably hot spot near one panel or a sauna that never quite reaches a satisfying temperature. As a starting benchmark, many suppliers recommend roughly 15 watts per cubic foot of cabin volume as a baseline, though this varies by panel type and how well-insulated your structure is. Problem one: panels mounted too close together create overlapping hot zones that can feel uneven rather than more powerful — spacing panels at roughly shoulder-width intervals along a bench wall solves this in most single-to-two-person layouts. Problem two: mounting a single high-wattage panel to save money often leaves large parts of the cabin — particularly lower legs and feet — noticeably cooler, since infrared heat doesn’t wrap around a body the way warmed air does; splitting the same total wattage across two or three smaller panels at different heights solves this more evenly than one large panel ever will. Problem three: panels mounted directly opposite each other at the same height can create a slightly disorientating “heat sandwich” effect at close range — offsetting panel heights, even by a few inches, generally produces a more natural, ambient warmth.
Insulation Requirements for Infrared Panel Conversions
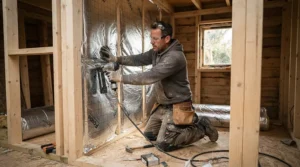
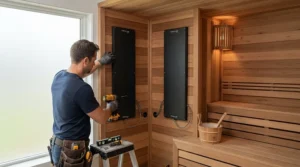
Because infrared heat radiates directly to the body rather than warming the surrounding air, it’s tempting to assume insulation matters less than in a traditional sauna — but that’s only half true. You still need enough insulation to stop the ambient temperature bleeding out through the walls entirely, which would leave the room feeling perpetually chilly even with panels running at full output, and you need a vapour barrier to stop moisture from repeated sweat sessions working its way into wall cavities and causing rot or mould over successive seasons. Reflective foil-backed insulation is the standard choice for sauna conversions generally, fitted behind the panelling with the reflective side facing inward to bounce residual heat back into the room rather than letting it escape through the timber frame. What the spec sheet won’t tell you, but experienced builders note, is that gaps around door frames and cable penetrations are where most heat loss actually happens in a well-insulated cabin — sealing these properly makes a bigger practical difference than upgrading from standard to premium insulation batting. Budget roughly an extra day of build time for insulation and vapour barrier fitting if you’re working from a bare shed shell rather than an already-lined structure.
Electrical Safety for Self-Builds: What UK Regulations Actually Require
This is the section to read properly even if you skim everything else. Fixed electrical work in a UK dwelling — including outbuildings like sheds and garden rooms wired from the house supply — falls under Part P of the Building Regulations, which exists specifically to reduce the risk of fire and injury from unsafe installations. In practical terms, this means new circuits feeding your sauna conversion generally need to be installed by a registered “competent person” or separately certified and notified to your local authority, rather than wired informally on a DIY basis. Electrical Safety First’s guidance for homeowners is a genuinely useful starting point before you touch a single cable, covering everything from circuit loading to the specific risks of heat-generating appliances in enclosed spaces. Beyond the legal side, sauna-specific electrical safety comes down to a few consistent principles: use an RCD-protected circuit given the moisture involved, keep all wiring and connections rated for the heat and humidity a sauna interior generates, and never daisy-chain multiple panels off a standard domestic extension lead, however tempting that shortcut looks on a tight budget. On the fire-safety side more broadly, RoSPA’s guidance on heat appliances in the home is a useful reminder that any fixed heat source, panel or otherwise, needs proper clearance from combustible materials and should never be left running unattended for long periods.
How to Choose Infrared Panels for DIY Sauna
- Measure your cabin volume first. Wattage decisions only make sense once you know the cubic footage you’re heating, so measure before you shop rather than after.
- Decide between standalone panels and a complete kit. Standalone panels like the Harvia Basic or Sentiotec Heat Wave suit builders who want full design control; a kit like the UK Saunas option suits those who want certainty over customisation.
- Check whether the panel is sauna-rated or repurposed. Options like byecold and KLARSTEIN are general-purpose heaters adopted for sauna use — genuinely workable, but worth factoring into your durability expectations.
- Confirm control-unit compatibility before buying multiple panels. Modular systems only stay modular if every panel works with the same controller.
- Budget for wiring and insulation, not just panels. The panel is rarely the most expensive part of a proper conversion once electrician fees and materials are included.
- Prioritise low-EMF ratings if wellness is your main motivation. Not every panel discloses this clearly, so check the listing or ask the seller directly.
- Read seller-specific feedback for unbranded kits. Generic carbon fibre panels vary more by seller than by spec sheet, so recent buyer feedback matters more here than elsewhere on this list.
Common Mistakes When Buying Infrared Sauna Panels
The most frequent mistake isn’t a bad panel — it’s buying panels before measuring the space, which leads to either an underpowered cabin or an expensive over-purchase of wattage you’ll never use. A close second is assuming every “infrared panel” listing is sauna-rated; as the byecold and KLARSTEIN entries above show, plenty of genuinely good panels are designed for living rooms and simply happen to work in a sauna context, which is fine as long as you go in with realistic durability expectations rather than assuming a sauna-specific warranty applies. Buyers also commonly underestimate wiring costs, treating the panel price as the total project budget rather than one line item alongside electrician fees, insulation, and timber. Finally, a surprisingly common error is buying panels from several different unbranded sellers to save a few pounds per unit, only to discover the control systems aren’t cross-compatible — sticking with one brand or one modular system, even at a slightly higher unit cost, tends to save money overall by avoiding a second purchase.
Infrared Sauna Panels vs Traditional Sauna Heaters
The fundamental difference comes down to how the heat reaches you. Traditional stove-style heaters warm the air in the cabin, which then warms your body through convection — this typically requires higher ambient temperatures, in the 70–90°C range, and a more substantial electrical supply to reach and maintain that heat. Infrared panels skip the air-warming step entirely, radiating heat that’s absorbed directly by the skin, which allows for a lower ambient cabin temperature, often somewhere around 40–60°C, while still producing a comparable sweat.
| Factor | Infrared Panels | Traditional Heater |
|---|---|---|
| Ambient temperature | ~40–60°C | ~70–90°C |
| Typical power draw | 300W–1400W total | 3kW–9kW |
| Heat-up time | Minutes | 30–60 minutes |
| Best For | Home DIY conversions, small circuits | Larger cabins, authentic Finnish-style heat |
For most home DIY conversions, that power draw difference is the deciding factor — infrared panels can often run comfortably on a standard domestic circuit, while a traditional stove heater frequently needs a dedicated higher-amperage supply that many self-builders simply don’t have available without significant electrical upgrade work. What traditional heaters offer in return is a more intense, authentically “Finnish sauna” experience for those who genuinely prefer higher heat and the ritual of throwing water on hot stones, so the choice ultimately comes down to whether you’re building for that specific experience or for a lower-cost, lower-power wellness routine.
Long-Term Cost & Maintenance
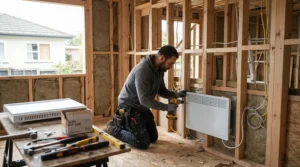
Upfront panel price only tells half the story — running costs and maintenance over several years matter just as much for a fair value comparison. A 400W panel like the Harvia Basic, run for a 30-minute session several times a week, adds a modest amount to a typical UK electricity bill compared with the far heavier draw of a traditional heater, which is a meaningful long-term saving if you’re a regular user rather than an occasional one. Maintenance is generally light across every panel on this list — wiping down the glass-ceramic or carbon front after use, checking mounting screws periodically, and avoiding harsh cleaning chemicals that can degrade the front surface over time. Where costs diverge more sharply is in parts availability: the UK Saunas kit’s five-year parts guarantee means a failed heater years down the line is a straightforward replacement, whereas a Generic Carbon Fibre DIY Sauna Panel Kit sourced from a marketplace seller who’s since stopped stocking that exact listing could leave you hunting for a compatible replacement. Factoring total cost of ownership rather than just sticker price tends to favour the branded, warrantied options for anyone planning to use their sauna for years rather than a single season of enthusiasm.
FAQ
❓ Do infrared panels need a special electrical circuit for a home sauna?
❓ How many infrared panels does a DIY sauna actually need?
❓ Can I fit infrared sauna panels myself without an electrician?
❓ What's the difference between carbon and ceramic infrared panels?
❓ Is infrared sauna panel kit review data trustworthy on general marketplaces?
Conclusion
Building your own infrared sauna isn’t a weekend that ends with a finished product by Sunday evening — it’s closer to a proper small home-improvement project, with electrical certification, insulation, and panel spacing all needing the same care you’d give a bathroom refit. What makes it worth doing anyway is the gap between what a boxed cabin costs and what a well-planned DIY conversion using infrared panels for DIY sauna components actually runs to, often a fraction of the price for a comparable result. Whichever of the seven panels or kits here fits your space and budget, the underlying principles stay the same: measure before you buy, respect the electrical regulations rather than working around them — the government’s official guidance on notifiable building work is worth bookmarking before you start — and don’t skimp on insulation just because infrared heat doesn’t need to warm the whole room the way a traditional heater does. Get those fundamentals right, and the difference between a cabin that gets used every week for years and one that becomes an expensive storage cupboard usually comes down to exactly the planning decisions covered above.
Recommended for You
- Carbon Fibre Infrared Sauna Panels: 7 Best UK Picks (2026)
- Binfrared Sauna Panels: 7 Top Picks & Costly Mistakes (2026)
- Near Infrared Sauna Panels: 7 Best Picks for UK Homes (2026)
Disclaimer: This article contains affiliate links. As an Amazon Associate, I earn from qualifying purchases. If you purchase products through these links, we may earn a small commission at no additional cost to you.
✨ Found this helpful? Share it with your friends! 💬🤗
